I love quilts, especially antique quilts, either applique or pieced,
and I want to share my journeys in quilting !

But, my "Threads and Treasures" sometimes include embroidery, painting, or spinning wool
and weaving
.

It is great that you are visiting, and I hope you feel at home here.
I would love it if you left a comment.

My website is www.janequilter.uk


Wednesday 27 February 2013

"Stofjes kiezen........Fabric choices"


In het blok waar ik nu mee bezig ben, wandelt een pauw tussen de bloemen en blaadjes. En dat betekent weer stofjes kiezen (vind ik altijd zo leuk....)..wordt de pauw blauw en groen, of.....zal ik er een blauw/paarse pauw van maken? Ja, Catalina houdt erg van paars, en er zit toch al weinig paars in de quilt, dus waarom niet? In een quilt mag alles...toch?

A peacock wanders among leaves and flowers in the block I am doing at the moment. That means choosing fabrics (I love that bit..) ....is the peacock going to be blue and green, or....shall I make him blue and purple? Yes, why not, Catalina loves purple and there is not much purple in the quilt, so why not? Everything is allowed in a quilt... isn't it?

En de staart heeft mooie ringetjes, zal ik die met reverse applique doen, of eens helemaal iets anders....? Ik denk dat ik voor het grappige stofje kies, met kippetjes en bloemhartjes...daar kan ik gewoon de bloemetjes uithalen...

The tail has got rings in it. Shall I do those with reverse applique, or something totally different? I think I am going to choose the fabric with the hens and flower heads, and just take the flower heads out....

Je ziet dat ik nog heel wat blaadjes moet doen, dus gauw weer verder!

As you can see, I also have a lot of leaves to do, so I'm off to do those!
Voordat ik verder ga moet ik je nog even vertellen dat onze zoon gisteren belde over het vorige blok met het lammetje, en het vestje wat iedereen zo mooi vond.

Before I go back to my block I must tell you that our son rang yesterday about the last block with the lamb and the waistcoat that everybody liked so much.
Hij zei "Mam, weet je nog dat ik ook zo'n soort kleur vestje aanhad toen Catalina en ik trouwden?"
Dus ik heb even gezocht tussen de fotos. Hier staat hij voor de dienst op de bruid te wachten...en warempel...

He said "Mummy, do you remember that I wore a similar colour waistcoat when Catalina and I got married?" So I looked up some photos. Here he is waiting for the bride before the service....and yes...
.....het lijkt erop! Leuk he?
Fijne dag!

.....it is very similar! Isn't that fun?
Have a nice day!

Jane


Saturday 23 February 2013

"Even Voorstellen..........May I Introduce.."


De langverwachte bruidegom! Catalina's Paradise quilt lijkt steeds meer op een echt paradijs! Hij had een roos bij zich voor zijn geliefde, maar die heeft hij zzolang in zijn hoed gestoken, want lammetjes houden ook van rozen....;o)

The long expected groom! Catalina's Paradise quilt looks more and more like a real paradise! He was carrying a rose for his beloved, but has put the rose in his hat, because little lambs like roses too....;o)

Al sinds het begin van deze quilt heb ik me afgevraagd of er wel of niet een bruidegom in zou komen, en nu is hij er dus. Ik heb hem getekend tussen de bloemetjes van het 6e blok van Corliss Searcey's patroon van de Civil War Bride quilt, en hij is ook geinspireerd door de bruidegom in de 'Bountiful Life' quilt.
Het lammetje vindt het heerlijk. Hij zit lekker gezellig tegen het mooie wollige tweed jasje, en wil niet meer weg. Dat is maar goed ook, want hij zit nu voorgoed in de quilt! Hij heeft ook genoeg te eten, met 39 blaadjes en al die knoppen en bloemetjes.

Ever since I started the quilt I have been wondering whether or not to put a groom block in, and now he has arrived! I drew him in between the flowers of the 6th block in Corliss Searcey's Civil War Bride quilt, and he has also been inspired by the groom in the Bountiful Life quilt.
The little lamb loves it. He sits there nice and cosy against the woolly tweed jacket and wants to stay there. Just as well, because he will be stuck in this quilt forever! He has enough to eat with 39 leaves, and lots of buds and flowers.

Na die mooie zomerdag deze week, moest ik toch wel de rest van het blok binnen afmaken bij de kachel, want het werd me toch koud!

After that lovely sunny afternoon in the garden, I had to finish the rest of the block by the fire, because it turned very cold again!

Ik denk er wel steeds meer over om de 'bruid' toch te gaan veranderen, daarover hoor je nog wel meer.
Fijne dag!

I am thinking seriously now about changing the 'bride' block, but you will hear more about that.
Enjoy your day!

Jane

Tuesday 19 February 2013

"Zonnestralen..........Sunshine!"


Elke keer als ik weer een nieuw blok begin, vind ik het weer spannend....alle deeltjes worden netjes in een blikje gelegd, deze keer een heel mooi Iers fudge blikje dat mijn lief kreeg voor z'n verjaardag in December. Nu heeft hij niets met blikjes, maar ik wel. En wat duurde het lang voordat hij het laatste stukje fudge dat erin zat, op had.......;o)

Every time I start a new block, I get excited....all the parts are put in a tin, this time a lovely Irish fudge tin that my beloved got for his birthday in December. he is not particularly fond of tins, but I am. It took so long before the last bit of fudge had gone....;o)
Maar eindelijk kon ik beginnen aan het blok met de bruidegom in Catalina's Paradise quilt, weet je nog?

But at last I could start on the bridegroom block in Catalina's Paradise quilt, do you remember?
Ik heb wel weer zijn kleren veranderd, maar de eerste stukjes werden vastgezet...

I have changed his clothes again, but the first pieces are sewn on....
Best vreemd, opeens zo'n man in mijn blok.....;o)
En vandaag scheen de zon, na weken en maanden van regen en mist, dus ik zat buiten!

Strange, suddenly a man in my block...;o)
And today after weeks and months of mist and rain the sun is shining, so I sat in the garden!
Heerlijk in het zonnetje, en je ziet alles zoveel beter, geen daglicht lamp nodig... Als je dan zo'n rozenknop maakt, lijkt het net zomer.

Wonderful in the sun, and everything is so much easier to see, I didn't need a daylight lamp....It almost seemed like summer, when I made the rosebud.
Vanuit de bomen in de tuin zongen de vogeltjes me toe...

The little birds were singing to me from the trees in the garden....
De schapen vinden het ook heerlijk....eindelijk eens wat droge wol op je rug...

The sheep love it too...at last some dry wool on their backs....

Gek he, dat je zo blij kunt worden van zonlicht op het gras....

Strange that you can feel so happy when you see the sunlight on the grass.....
Zelfs de Kerstroos denkt erover om te gaan bloeien....

Even the Christmas rose thinks about flowering....
Intussen ga ik lekker verder met het bruidegom blok...het blikje is al bijna leeg..

And I carry on stitching...the tin is almost empty.....
Tot volgende keer!

Enjoy your day!

Jane


Saturday 16 February 2013

"Blaadjes.....Tutorial.....Leaves"


In Catalina's Paradise/Civil War Bride/Bountiful Life quilt zitten honderden blaadjes, dus het is wel fijn als je geen moeite hebt met scherpe puntjes. Ik zal je laten zien hoe ik deze blaadjes maak, omdat ik er vaak vragen over krijg. Er zijn denk ik wel net zoveel methodes als er quiltsters zijn, maar hoewel ik allerlei manieren heb geprobeerd, is dit mijn favoriet. Je kunt altijd ook mooie puntjes krijgen als je lijm gebruikt, maar ik hou gewoon niet van lijm in mijn quilts, en ik knip ook niet graag in de achtergrondstof om het papier eruit te halen, dus vandaar doe ik het op een heel ouderwetse manier, needleturn - beslist niet liberated...;o)

In Catalina's Paradise/Civil War Bride/Bountiful Life quilt you come across hundreds of leaves, so it is great if you like doing leaves with sharp points. I'll show you how I make the leaves, because I often get questions. There are of course lots of ways of doing them, and I have tried many different ways, but this is my favourite. If you use freezer paper on the back, with glue, you get nice pointed leaves easily, but I don't like glue in my quilts, neither do I like cutting my background fabric to take the paper out, so I prefer it this way, very old-fashioned needleturn - definitely not liberated...;o)
Allereerst knip ik het blaadje uit freezerpaper en strijk het op de goede kant van de stof. 

First I cut the leaf out of freezerpaper, and iron it on the right side of the fabric.
Dan teken ik er met de Clover witte pen omheen. Het laat een heel dun bijna onzichtbaar streepje achter.

Then I draw around the leaf with my white Clover pen. It leaves a nearly invisible line.
Dan knip ik het blaadje uit met een naad toeslag. Meestal doe ik het tegenwoordig zonder pen, want ik heb steeds dezelfde naad toeslag, ongeveer 3 of 4 mm, dus gewoon op het oog.

Then I cut the leaf out with a seam allowance. Often I do it without a pen, because I always use the same seam allowance, about 3/16 or 1/8 inch. 
Ik haal het freezer paper eraf en rijg het blaadje vast. Het papier laat ik er niet op want dat zit me in de weg. Ik wil kunnen zien wat ik doe. Dan begin ik te appliceren bij een punt. Op de foto kun je zien dat ik nu bij de volgende punt terecht kom.

I take the freezer paper off, and baste the leaf onto the background. I don't leave the paper on, because I don't like the stiffness and I want to see what I am doing. Then I start stitching at one end of the leaf. On the photo you can see that I have almost got to the other end.
Ik knip niets van de naad toeslag af, maar zet twee kleine steekjes precies op wat straks de punt van het blaadje wordt.

The seam allowance stays intact, but I do take two tiny stitches on the point of the leaf.
Als je onder het blaadje kijkt, zie je daar het puntje van de onderlaag.

When you look underneath the leaf, you can see the tip of the layer that is turned under.
 
Dat puntje moet er af geknipt worden, schuin nar beneden.

That tip needs to be cut off, slanted down.
Aan de bovenkant is dus niets veranderd.

Nothing has changed on the outside of the leaf.
De volgende twee stappen zijn belangrijk, want daardoor krijg je een mooie platte punt aan het blaadje.
Eerst vouw je met het eind van de naald de naad toeslag naar beneden en naar achteren, zodat de naad toeslag horizontaal gevouwen ligt

The next two steps are important, because that is how you get a nice flat point on your leaf.
First you fold down the seam allowance to the back, with the point of the needle, so that the seam allowance lies horizontally folded.
Daarna vouw je weer met de punt van de naald de hele naadtoeslag stevig in een keer naar binnen. Je kunt zien waar het verdwenen is op de foto. Soms zet ik nog een extra steekje op de punt, maar niet altijd.

Then you fold the rest of the seam allowance firmly to the inside. You can see where it has disappeared on the photo. Sometimes I make an extra stitch on the point, but not always.
 En dan needleturn je weer verder langs de rand tot aan de punt waar je begonnen bent.

Then you can carry on needleturning until you get to the other end.
Voordat je helemaal tot die punt bent, moet daar hetzelfde gebeuren. De schaar wijst het puntje aan wat er onder uit steekt....

Before you get to the other point, you have to do the same thing again. The scissors show where the underlying point sticks out....
Dus die moet ook weer op dezelfde manier afgeknipt worden.

That point has to be cut off in the same way.
Daarna komen er weer die twee stappen, eerst het puntje naar beneden vouwen, zodat het horizontaal ligt...

Then there are the two steps, first fold the point down to the back, so that it looks horizontal.....
Daarna zwiep je de rest stevig naar binnen met het uiteinde van de naald, en houd het goed vast met je duim, zodat je dan de rand helemaal dicht kunt appliceren tot op het puntje..

And then you turn the seam allowance inside with the tip of the needle, and hold it there with your thumb, so that you can applique right up unto the point of the leaf.
Daar is het blaadje....Deze methode werkt ook voor hele slanke, dunne blaadjes, maar dan houd ik de naad toeslag op niet meer dan 3 mm..

There it is.....This method also works for very thin leaves, but then I keep the seam allowance to 1/8 inch.
Het was een beetje moeilijk goede fotos te nemen, wat het was de hele dag erg mistig en donker weer. Dit zagen we al bij het ontbijt....en het veranderde de hele dag niet!

It was difficult to take sharp photos, because it rained all day, and it was misty and dark. This is what we saw when we had breakfast.....and it didn't change all day!
Maar ik hoop dat je er toch wat aan hebt, en met net zoveel plezier als ik blaadjes zult maken, op welke manier dan ook!
Fijne dag!

But I hope it has shown you clearly how I do leaves, and I hope you enjoy doing them as much as I do, whatever method you use!
Have a nice day!

Jane

Friday 15 February 2013

"Besjes.......Tutorial.......Berries"

Na wat aarzeling is hier dan de 'tutorial' - klinkt veel belangrijker dan het is, want ik denk dat je al wel besjes kunt maken, alleen is het altijd wel leuk om te zien hoe een ander dat nou doet.
Ik vind besjes maken erg leuk, maar op deze manier is het ook erg vlug en gemakkelijk.
Om besjes op karton te tekenen gebruik ik soms een passer, maar ook vaak deze gele plastic plaat.

After some hesitation here is the 'tutorial' - sounds more important than it is, because I think you can already make berries, but it is always fun to see how someone else does it.
I like making berries, but this way makes it really quick and easy.
To draw the berries on card, I sometimes use a pair of compasses, but often the yellow template sheet.
De besjes worden uitgeknipt, heeeel voorzichitg zodat ze mooi rond worden. Hoe ronder het kartonnetje, hoe mooier de besjes worden. De ene is 9 mm in doorsnee, en de andere 13 mm.

I cut them out very carefully, to keep them nice and round. The rounder the card, the more beautiful the berries become. One is 9 mm (3/8") and the other 13 mm (1/2").
Ik leg ze op de verkeerde kant van de stof, en teken er een ongeveer 6 mm (1/4 inch) cirkel omheen.

They are on the wrong side of the fabric, and I draw a circle around them of about  1/4 inch.
 Dan knip ik de cirkeltjes uit langs de buitenste lijn.

Then I cut out the circles around the outside line.
Meestal gebruik ik een draad in de kleur van het besje, maar wit is hier duidelijker te zien. Ik maak een knoopje in de draad en ga met kleine rijgsteekjes rondom het besje, ongeveer middenin de rand.

Usually I use a colour  that matches the fabric, but white is clearer to see here. I put a knot in the thread, and start to make small basting stitches around the berry, in the middle of the border.
Als ik de begindraad weer tegenkom ga ik iets verder en dan steek ik de naald door.....

When I get back to where I started, I make one more stitch and then I take the needle through.....
 ....naar de goede kant van de stof, en laat de draad van ongeveer 15 cm eraan hangen. Die draad gebruik ik straks om het besje te appliceren.

......to the right side of the fabric, and leave the length of thread hanging. This thread I will use later to stitch the berry onto the background.
 Daarna leg ik het kartonnetje in het midden op de verkeerde kant, druk het met mijn vinger op de tafel zodat het in het midden blijft, en trek de draad stevig aan. Ik gebruik meestal katoen voor besjes, omdat zijde wat glibberig is, en katoen de stof beter 'pakt'.

Then I put the card in the centre of the wrong side, hold it down firmly with my finger, and pull the thread tight. I usually use cotton for berries, as silk is a bit slippery, and cotton 'hugs' the fabric better..
 Als ik er zo een heel stel gemaakt heb, gaan we naar de strijkplank. Met een heet strijkijzer druk ik ongeveer 7 seconden heel hard op het besje aan de verkeerde kant, zodat het zo plat als een dubbeltje wordt. (dubbeltje klinkt toch wel veel leuker als 10 eurocent vind ik.)

When I have made a batch, they go to the ironing board. With a hot iron I press down very hard on the wrong side of the berry, for about 7 seconds, so that they look like little flat pancakes (have I missed pancake day again...?)
Als ze uit de besjes oven komen mogen ze afkoelen totdat ik ze nodig heb.  Dan pak ik een speld en open de achterkant en haal het kartonnetje er uit. Als je een heel bol besje wilt, kun je er nu in plaats van karton een stukje vulling inleggen. Voor de hele kleintjes hoeft dit niet, want al die stof erachter maakt al dat ze bol staan.

When they come out of the berry bakery, they can cool off until I need them. I then take a pin and prize them open so that I can take the card out. If you want a plump berry, you can replace the card with a little piece of wadding at this point. It is not necessary for the tiny ones, because all that fabric behind will make them look fat.
 Met de lange draad kan ik ze mooi weer in vorm trekken.

I can pull them in shape again with the long thread.

En dan kan het appliceren beginnen, met dezelfde lange draad.

Then I can start to stitch them on, with that same long thread.
Ziedaar - mooie ronde besjes.

There we are, nice round berries.
Makkelijk he?
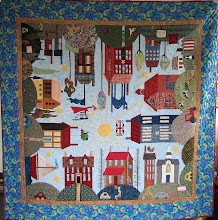
Maar als ik hele piepkleintjes maak, bijvoorbeeld voor een oogje van een vogeltje, van 3 tot 6 mm doorsnee, dan knip ik gewoon een rondje uit, en appliceer het regelrecht met needleturn, met een nauwe naad toeslag, omdat de rand niet groot genoeg kan zijn om door te rijgen. Zo heb ik het oogje van dit vogeltje gedaan.

Easy isn't it?
But when I make them even smaller, for example 1/4 inch or smaller,  then I just cut a circle from the fabric, with a very narrow seam allowance, and needleturn around the drawn circle, because the border couldn't be wide enough to baste through.That's how I did the eye on this little bird.

Ik hoop dat je hier iets aan hebt, in ieder geval weet je nu hoe ik het doe.
Het lijkt me beter om de scherpe bladpuntjes in een ander blogje te zetten, want er zijn nu al zoveel fotos!
Fijne dag!

I think I shall leave the points on leaves until another blog, because there are a lot of photos already.
I hope you have enjoyed this, in any case you now know how I do it.
Have a nice day!

Jane  
Related Posts Plugin for WordPress, Blogger...