I love quilts, especially antique quilts, either applique or pieced,
and I want to share my journeys in quilting !

But, my "Threads and Treasures" sometimes include embroidery, painting, or spinning wool
and weaving
.

It is great that you are visiting, and I hope you feel at home here.
I would love it if you left a comment.

My website is www.janequilter.uk


Tuesday 27 August 2013

"Love Hearts"


Roze en rode hartjes..............wat was het leuk om die te maken....

Red and pink hearts...........I really enjoyed making those...

Met hele fijne puntjes, die met needleturn toch echt niet moeilijk waren...

With long, fine points, not very difficult to do with needleturn...

Eerst de rode..

First the red ones...

Dan de kijkgaatjes met reverse applique, en daarna de roze hartjes, en voordat je het weet heb je dit...

Then the peepholes with reverse applique, and the pink hearts, and before you know it, it looks like this......

Maar er moest nog meer gebeuren aan Esther's Love Entwined.

But some more had to be done to Esther's Love Entwined.

Ik moest nog heel veel kleine rondjes op de creme bladeren appliceren...

I had to applique lots of small circles on the cream leaves....

En de kijkgaatjes vielen wat weg tegen de achtergrond, dus heb ik er maar een bruin lijntje in geborduurd....dan valt het wat beter op.

The reverse applique did not show up very well against the light background, so I embroidered a thin brown line.....much better.

Zo ver ben ik tot nu toe.

This is how far I am now.

Fijne dag

Have a nice day

Jane


Tuesday 20 August 2013

"Off-Block Reverse Applique"


Het eerste blad was af van deel 3 van de Love Entwined van Esther, en eigenlijk was ik niet helemaal zeker of ik die lichte kleur nu wel zo geslaagd vond....

The first leaf from part 3 of Esther's Love Entwined was finished, and I was not really sure if I liked the cream fabric.....

Dus begon ik eerst maar met de bloemen tussen die bladeren...Eerst omtrekken met mijn witte Clover pen.

So I started with the flowers in between the leaves....First I drew around them with my white Clover pen.

Daarna een stukje licht roze stof achter de opening in het midden rijgen....

Then I basted a piece of light pink fabric behind the opening in the centre....

En daarna deed ik de reverse applique Off-Block (van het blok af)...

And then I did the reverse applique of this flower Off-Block..
Als ze alle vier klaar zijn, knip ik de overtollige stof van achteren weg.


When all four were finished, I cut away the surplus fabric from the back.

En daarna kan ik gewoon de hele bloem op de achtergrond stof appliceren.

Then I can just applique the whole flower normally on to the background fabric.

Ik denk dat ik nu toch maar het tweede blad er op zet...

Perhaps I will sew the second leaf....
Eigenlijk zou het best kunnen met die lichte beige stof...

The beige fabric might look fine when it is all finished...

Misschien nog een dun lijntje om de reverse applique in het midden van de bladeren......dus ik denk dat ik het maar laat zitten.
Fijne dag!

Perhaps I might embroider a very fine line around the reverse applique in the centre of the leaves.....so I think I will leave it there.
Have a nice day!

Jane


Sunday 18 August 2013

"Reverse Applique?"


In deel 3 van Esther's Love Entwined BOM  komt ook reverse applique voor.
Bij reverse applique wordt een gedeelte uit de bovenste stof wggeknipt, de naad toeslag naar achteren geslagen en geappliceerd, zodat de onderste stof zichtbaar wordt.

The next part of Esther's Love Entwined BOM has some reverse applique in it. 
In reverse applique a part of the fabric on top is cut away, and the seam allowance is turned under, and appliqued, so that the fabric underneath becomes visible.

Misschien is het wel leuk om te laten zien hoe ik dat doe. Eerst trek ik met potlood een dun lijntje om het freezer paper patroontje op de stof,

Perhaps you would like to see how I do that. First I draw a thin line around the freezer paper pattern on the fabric,

Dan speld ik het blaadje op de goede plaats op de achtergrond stof....onder het plastic waar het patroon op staat, zodat ik goed kan zien waar alles komt...

Then I pin the leaf in the right place on the background fabric.....under the overlay with the pattern on it, so that I can see where everything goes...

....haal het freezer paper er af, en natuurlijk het plastic, en rijg het vast. Ik had al een klein stukje uit het midden van het blad geknipt voor de reverse applique.

...take off the freezer paper and the overlay and baste them. I had already cut a small slit in the centre of the leaf for the reverse applique part..

Daarna begin ik met needleturn om de buitenkant van het blad.

I then start to needleturn around the outside of the leaf.

Als dat klaar is, knip ik kleine slitjes halverwege in de naad toeslag aan de binnenkant, maar ik knip nog niet tot aan de punt, en ik begin met needleturn.

When that is done, I cut little slits halfway into the seam allowance around the inside, but I don't cut all the way to the point yet, and I start to needleturn.

Nadat ik met needleturn eigenlijk niet verder kan, knip ik tot aan het puntje.

After I cannot really carry on with needleturning, I cut right into the point. 

Als ik bij het puntje kom, neem ik twee extra steekjes......

When I get to the point, I take two extra stitches.....

En ga langs de andere kant weer omhoog. Je kunt zien hoe de achtergrondstof zichtbaar wordt.

And carry on stitching along the other side. You can see how the background fabric is revealed.

Ik doe hetzelfde bij de andere punt, en het is af.

I do the same at the other point, and it is done.

Hier is een voorbeeld van een van mijn Baltimore blokken dat volledig is gedaan met reverse applique. Alleen hier heb ik deeltjes uit de achtergrondstof geknipt, om stof daarachter zichtbaar te maken.

Here is an example of one of my Baltimore blocks that has been stitched completely in reverse applique. Only here I have cut parts out of the background fabric to reveal the fabric behind that.

Op het blad van Love Entwined ga ik dezelfde cirkeltjes appliceren die ook op de rand om het kompas zitten.

On the leaf of Love Entwined I am going to applique the same circles that are also on the ring around the compass.

Fijne dag!

Have a nice day!

Jane


Tuesday 13 August 2013

ZIG ZAG


Al mijn huiswerk is af....

All my homework is finished...

De zig zag rand is dus ook helemaal klaar, dus nu maar wachten op het volgende deel van Esther's 1790 Love Entwined....

The zigzag border is also done, so I can wait for the next part of Esther's 1790 Love Entwined.....

Ook de hoekjes zijn er op geappliceerd, zoals altijd, met needleturn..

The corners have been appliqued on, with needleturn as usual...

Elk driehoekje is weer anders...

Every triangle is different....

En weet je waar ik nu zo blij om ben?
Dat er helemaal geen Floriani fusible stabiliser meer in de wiebertjes zit.

And do you know why I feel incredibly happy?
There is no more Floriani fusible stabiliser inside the diamonds.

Die had ik gebruikt in plaats van freezer paper, om de wiebertjes aan elkaar te zetten. Maar nadat ik ze aan een kant op de achtergrond had geappliceerd, vond ik het toch erg stijf aanvoelen.
Dus, een pincet erbij...

I had used them instead of freezer paper, to  hand-piece the diamonds to each other. But after I had appliqued one border on one side, I thought it felt rather stiff. 
So....I got some tweezers....

Hier liggen alle slachtoffers.....en mijn stof voelt weer heerlijk zacht en zonder iets 'vreemds' erin!

Here are all the casualties in a heap....and my fabric feels lovely and soft without foreign bodies in there...

Ook de buitenste sterbloemen zijn af.

The outside star-flowers are finished too.

Nu maar weer verder met het quilten van Catalina's Paradise....

Now I can carry on with quilting Catalina's Paradise quilt....

Fijne dag!

Have a nice day!

Jane


Saturday 10 August 2013

"Centre..."


Het middenstukje van de Love Entwined by Esther is af.....

The centre of the Love Entwined by Esther is finished....

Dit waren de eerste vier ster-bloemen... Ik laat ze even apart zien, omdat er zoveel stofjes in zitten, en vanaf een afstand is dat nooit zo goed te zien.

These were the first four star-flowers.. I am showing them separately, because there are so many fabrics, and it is always more difficult to see them from a distance.

en dit de volgende...
Ik vind het heerlijk om alle verschillende stofjes in antieke quilts te bekijken, dat geeft me altijd weer inspiratie. Hoewel de foto van de originele quilt alleen maar in zwart wit is, kun je toch wel zien dat er veel stofjes in verwerkt zijn.

..and these the next four....
I love looking at fabrics in antique quilts, it always inspires me. Although the photo of the original Love Entwined coverlet is in black and white, you can see that many fabrics were used.

Ze zijn allemaal geappliceerd met needleturn, zonder stijfsel of Floriani er in.
En nu moet ik er nog vier, bij de zig zag rand.

They have all been done with needleturn applique, without starch or Floriani inside.
Now I have to do four more, near the zig zag border.

Daarna nog even de rand afmaken, en dan is het al bijna weer tijd voor het volgende deel. Misschien krijg ik ook nog even tijd om verder te quilten aan Catalina's quilt....?

After that I will finish the border, and then it is almost time for the next part of the pattern. perhaps I will get a little bit of time for quilting Catalina's quilt...?

Vanmorgen vroeg was het zo mistig, ik kon bijna de buren niet zien....

This morning it was so misty, I could hardly see the neighbours....

Fijne dag

Have a nice day

Jane

Tuesday 6 August 2013

"Needleturn Flower..."


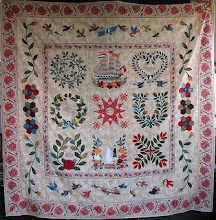
Vandaag ben ik begonnen met de mooie ster-bloemen in de 1790 quilt Love Entwined van Esther. In die antieke quilts vind je vaak van die bloemen.
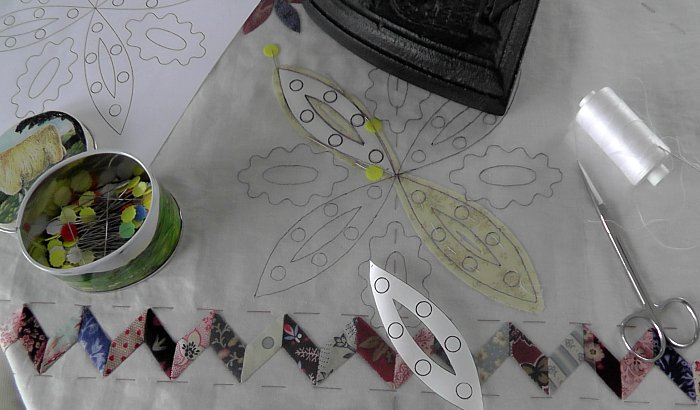
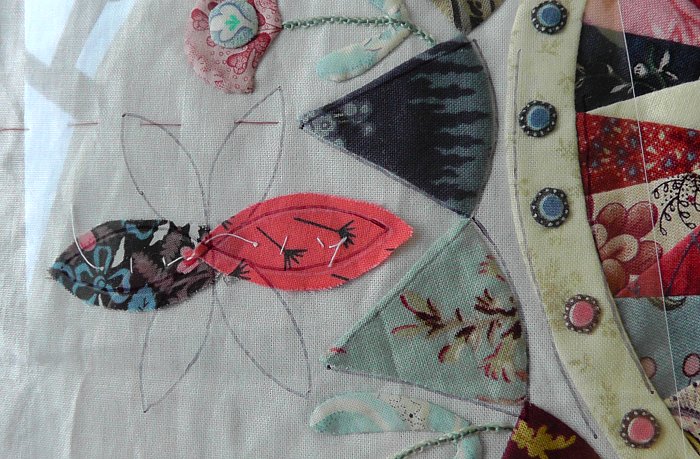
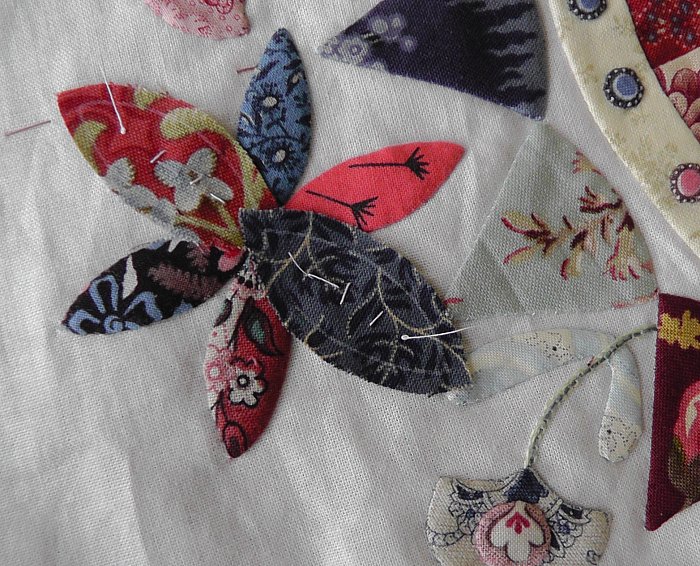
Zoals gewoonlijk maak ik eerst een overlay van plastic, en leg daar de eerste blaadjes onder, op de goede plaats. Ik begin met de blaadjes die tegenover elkaar zitten, want dan krijg je straks de puntjes mooi bij elkaar.

Today I started with the lovely star-flowers in the 1790 Love Entwined quilt by Esther. In antique quilts you often find these flowers.
As usual I make an overlay of plastic, and place the first leaves under it. I start with opposite leaves, because that will help to get the points closely together later on.

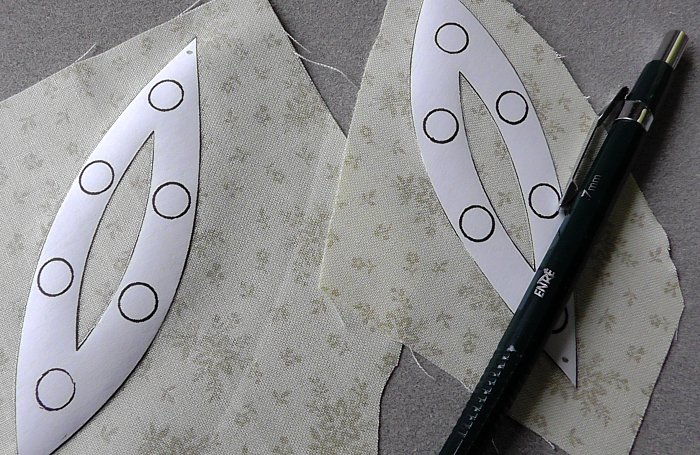
Alle blaadjes zijn al uitgeknipt, met het freezer paper er nog op want dat is gemakkelijker neer te leggen onder het plastic. Ik teken om het freezer paper met een witte Clover pen.

All leaves have been cut out, with the freezer paper still on, because that makes it easier to place them under the plastic. I draw around the freezer paper with a white Clover pen.

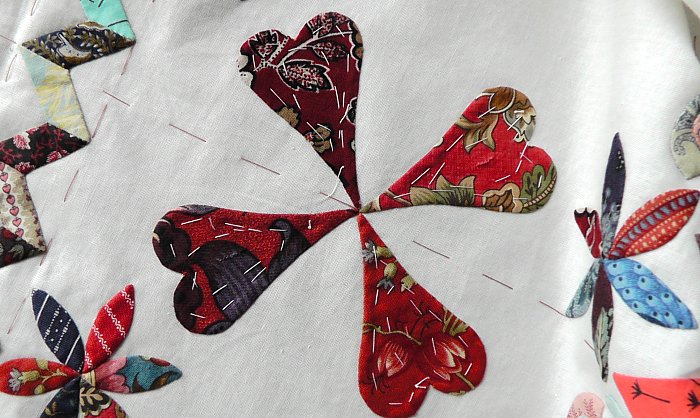
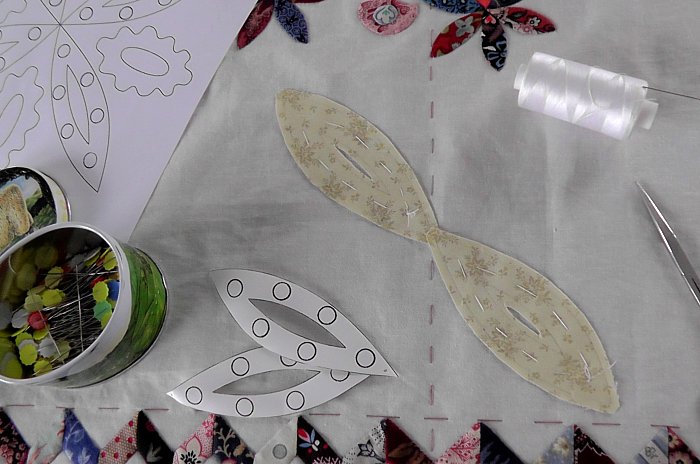
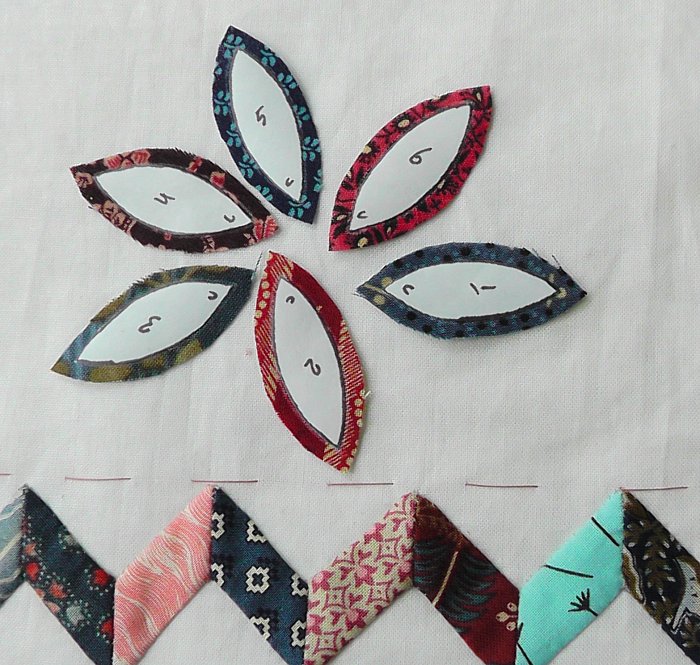
Als de eerste twee blaadjes er op gezet zijn met needleturn, begin ik aan de volgende twee. Normaal leg ik ze er alle zes op, maar ik laat het op deze manier zien, zodat je de volgorde kunt zien waarin ik ze appliceer.

When I have appliqued the first two leaves with needleturn, I start the following two. Normally I lay all six down at once, but I am showing it this way, so that you can see the order in which I applique them.

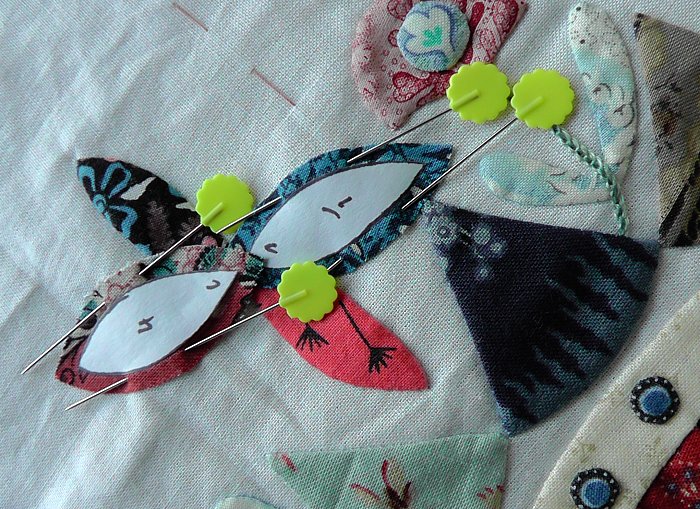
 Deze worden er eerst opgeregen, nadat ik het freezer paper er af heb gehaald.

After I take off the freezer paper, I baste them on lightly.

Als die ook vast zitten, komen de laatste twee aan de beurt.

When those are stitched down, it is the turn of the last two.

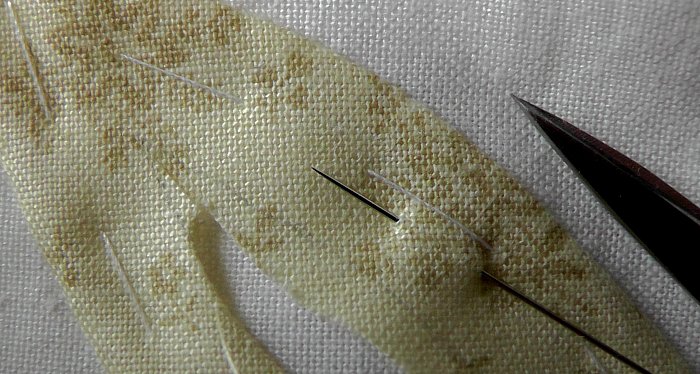
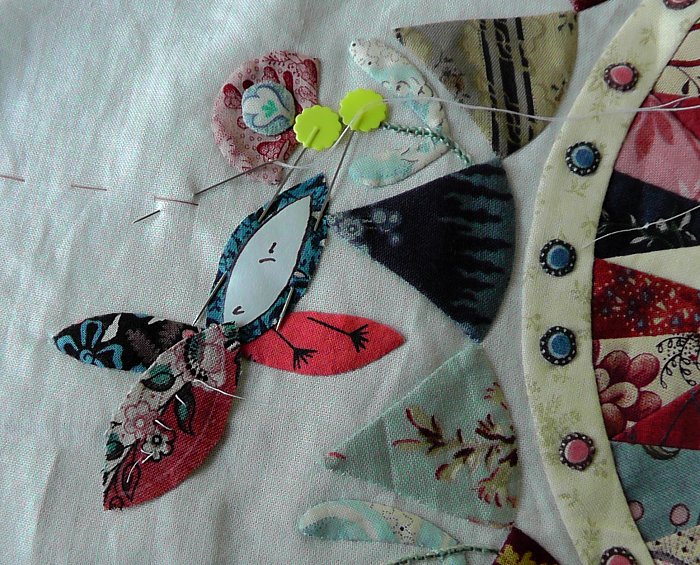
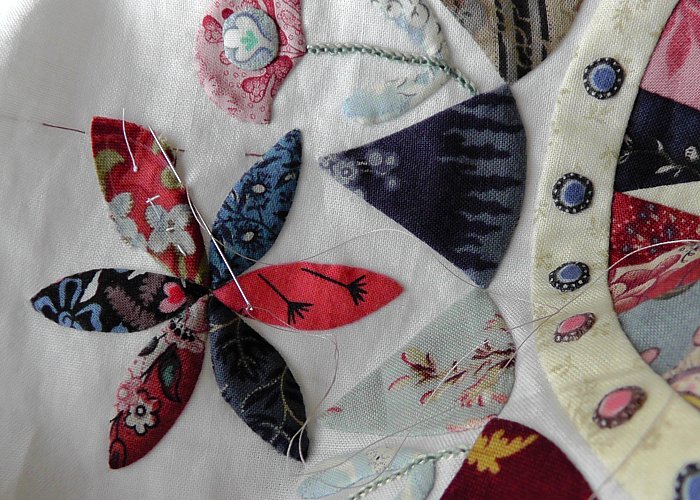
Terwijl ik aan de puntjes werk, steek ik het blaadje er tegenover even naar achteren, zodat ik goed kan zien wat ik doe. Deze blaadjes zijn zo klein, dat dat wel nodig is! Hier kun je zien hoe ik de puntjes aan de blaadjes doe.

While I work on the tiny points, I pin the opposite leaf back, so that I can see what I am doing. These petals are so small that that is necessary! Here you can see how I do the fine points.

Al vlug ben ik de laatste aan het appliceren.

Before long I am stitching the last one.

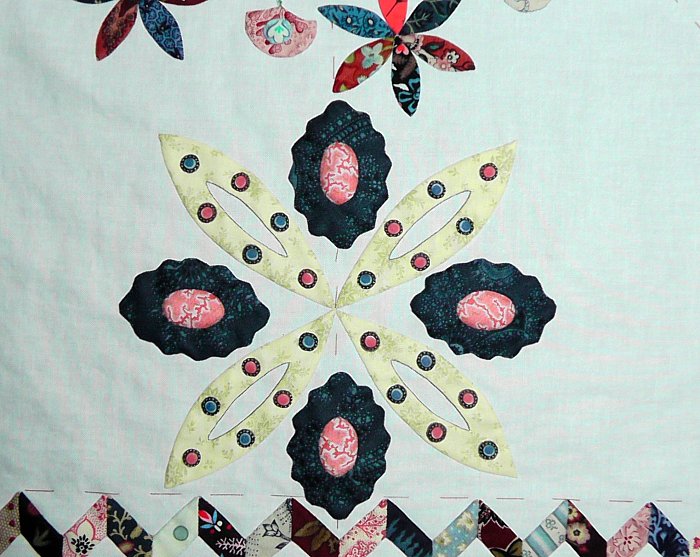
En dan is het bloempje klaar.

And the flower is finished.

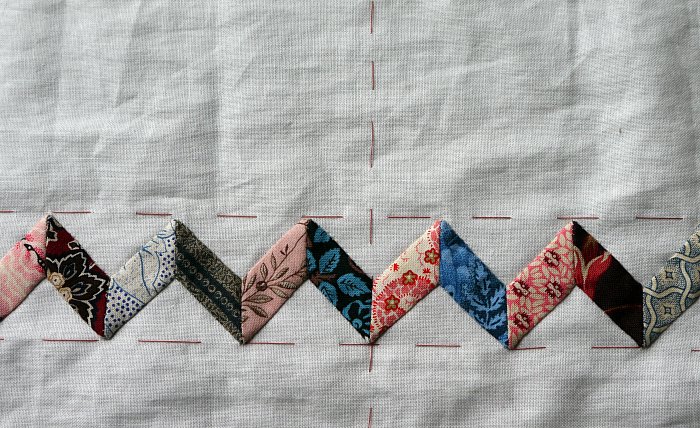
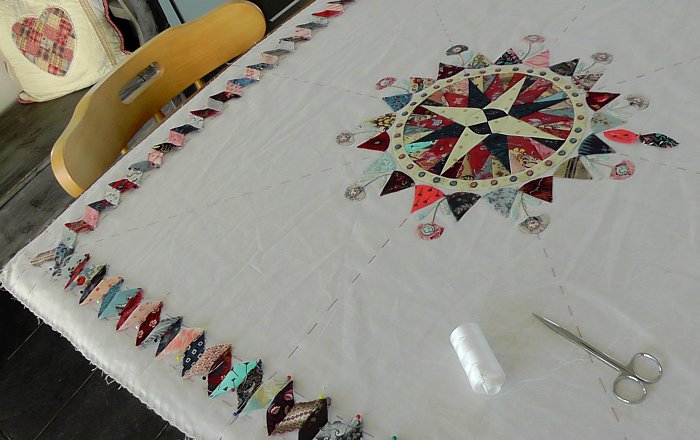
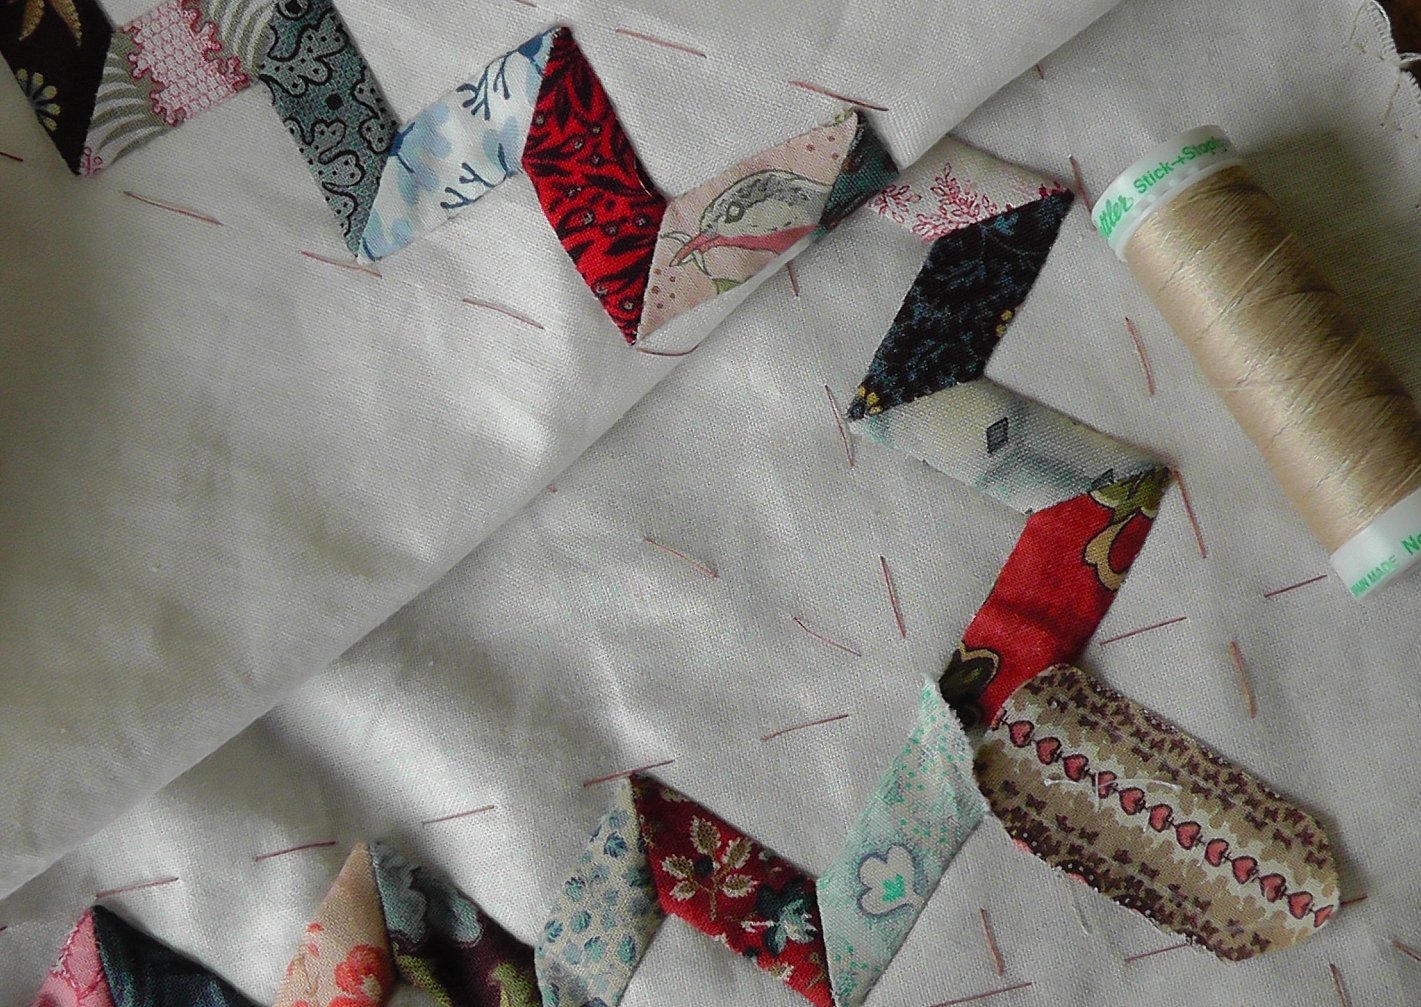
Intussen heb ik ook de zig zag rand op de achtergrond geregen.

In the meantime I have basted the zigzag border onto the background.

Omdat er zoveel kleurtjes in zitten, ben ik ze aan het appliceren met een kleur katoen, Light Taupe.

Because there are so many different colours, I use one colour cotton - Light Taupe.

De hoek laat ik voorlopig zo, want daar wordt straks het stokje en een driehoekje op geappliceerd.

I leave the corner for now, because later on I will applique the corner piece and the triangle on top.


Een paar dagen geleden bracht de postbode een heel leuk pakketje uit Australie, van Glenda. Er zaten prachtige zijden stofjes in, allerlei mooie kleuren. wat heb ik zin om daar mee te gaan spelen..... Dank je wel, Glenda!!

A few days ago the postman brought a lovely surprise from Australia, from Glenda. In the parcel were lovely silks, lots of colours, and so beautiful. I can't wait to have a play with them! Thank you, Glenda!

Soms zitten er 's avonds heel veel vogeltjes op de electriciteitsdraden.  Ze zijn klein en rond met heel spitse snaveltjes....

Sometimes there are lots of little birds sitting on the wires...They are small and round with very pointed beaks....could they be Bramblings?

Gisteren regende het pijpestelen, maar het was wel een mooi gezicht om de pareltjes op de bloemen te zien vanuit het raam...

Yesterday it rained nearly all day, but looking out of the window I saw lots of pearls on the flowers.

En dit is een van mijn uitzichten als ik hier bij de tafel zit te appliceren. Het is altijd mooi, al zijn er soms heel donkere wolken....

And this is one of my views when I sit by the table and stitch. It is always beautiful, even if there are some dark clouds sometimes....

Fijne dag!

Have a nice day!

Jane


Related Posts Plugin for WordPress, Blogger...